 Want to further automate your printing and cutting workflow? Let’s take a look at adding contour cut lines automatically when files are imported, and how to setup an automated Contour Cutting workflow in Digital Factory!
Within Digital Factory, you have a few options to create, edit, or delete contour cutlines. These include:
- Manually adding contour cut lines.
- Automatically adding cutlines on import.
- With the “Contour Cut…” dialog.
- In the Variable Data Wizard.
Digital Factory can generate contour cutlines automatically on files regardless if the files are vector based files, like Ai, EPS, or PDF, or Image files like PSD, Tiff, PNG. The cut lines are generated on the opacity of the graphics, we create the cutlines around solid areas (regardless of color). Jpg files cannot be used for automated Contour cutting, as they do not support transparencies.
For a refresher, take a closer look at our articles on Contour Cutting and Contour Cutting in our Variable Data Wizard (VDW).
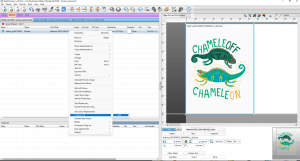
For an example, we’re working with a PNG File, which has a white contour around the design. We want to add a contour cutline. In this case on we want to use our “Add Contour”, which creates Contour cut lines on a job by job basis.
We start by selecting our Print and Cut Queue that we want to use. Navigate the following menu options:
- Queue.
- Properties (Or double click onto the Queue Tab).
- Cutter.
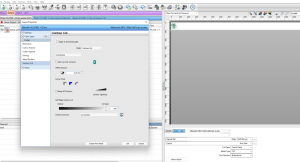
- Contour Cut and (the Contour Cut settings show).
- Untick “Apply to all incoming jobs”.
The Contour Cut settings here are nearly the same as in our other contour cut dialogs. You can tick “Also cut inner contours”, you can give an offset and define a corner style. You also have a soft edge contour cut slider which is the same as the monochrome filter in our other contour cut dialogs
You can choose which cutting process you want to use with the scroll down menu, and when you tick “Merge all Contours” you can define how close you want to merge.
(Please have a look to the Variable Data Contour Cutting starter videos, which explain the functions in detail).
You can also define the contour accuracy when you click the button right of the pulldown menu. A dialog opens where you can define how close you want to follow the transparency – solid line and how sharp the corners should be. A speckle filter and a snap long lines to vertical/horizontal are also available.
For our sticker, we untick “Apply to All incoming jobs” and choose our:
- Contour cut type
- Offset
- Corner style
- Soft edge value
before finally clicking OK.
When a job is imported, we can add a contour cutline by:
- Right clicking on the job.
- Select “Contour Cut”.
- “Add”.
 The Contour Cutline is added without any other dialog popping up, using the settings in the queue properties.
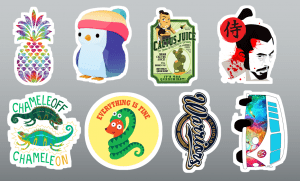
Let’s say we have a series of stickers where we want to apply a Contour cutline. The stickers already have a white contour, and we want to create the cutline around the white area. Here we want to use the automated contour cut on import setting.
In contour cut settings in the queue properties, we tick “Apply to all incoming files”, leave the other settings as they are, and press “OK”.
In the layout manager we have selected “Autonest” and have given a space between jobs. We import our batch of PNG files and a contour cutline with the stroke name “CutContour” will be created for each job automatically.