 Want to get a gradient effect in your engraving? Using a vector shape (or text) as a starting point, the “Contour Fill” tool is used to simulate a gradient effect that can then be applied with tool paths.
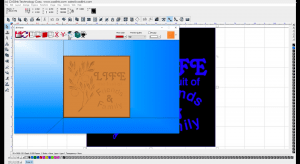
Getting started with this feature is easy. With your vector design selected, begin by choosing:
- “Transform” menu
- “Contour Fill”
- “Internal”
The Contour Fill controls will appear in the SmartBar. On a side note, the controls are similar when performing an External contour fill. The intent is to create a grayscale bitmap, and for this reason you would set the “Start Color” and “End Color” to BLACK and WHITE. If you need to change these colors, then clicking on them will open the Color Selection dialog. Here you can either click to choose a suitable color, adjust the hue, choose a Shop Palette color, or set a specific RGB color.
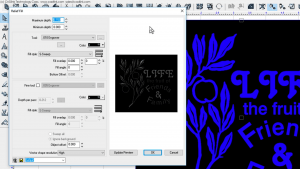
Once your colors are selected, adjust the number of steps and the width between steps. This will determine the smoothness of the gradient effect that is visible in the on-screen preview. A high number of thinly spaced steps should be effective, though the settings will vary according to how large the design is.
Normally, the “Contour Fill” feature will produce vectors, but clicking the “Render” button and setting the “Color Depth” to 256 Gray will create a grayscale bitmap. The “Resolution” field indicates the bitmap quality, which you should set according to your job.
As a general guideline:
- 75 is considered low quality.
- 150 would be medium quality.
- 300 or more would be high quality.
However, please note that more processing time is required when setting a high resolution.
If you need the contour fill to fade into transparency, then enable the “Opacity Settings” at the far-right of the menu.
To create a black background:
- Layout menu.
- Create Plate Size Object.
This will create a rectangle shape that is equal in dimension to the plate size. In the “Shop Palette”, click “BLACK” to set the fill color.
From the “Edit” menu, choose “Select All” to ensure that the entire design has been selected.
Then choose:
- “Engrave” menu.
- “Create Tool Path”.
- “Relief Fill”.
 For these settings in the “Relief Fill” dialog, cutting depths will vary according to the light and dark areas of the design.
After the tool paths have been created, you can choose
- “View menu”
- “Show 3D”
to preview how this job will look when completed.
With these options, you should be able to create contour fills that give your engravings a bit more depth and detail!