 Want to remove black automatically from a design so that the print blends perfectly onto a black shirt? With the Setup Black Removal wizard, you can!
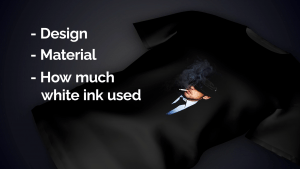
The amount of black removal depends on the design, the material, and how much white ink is being used. It’s important to note, the Setup Black Removal wizard should only be used for black garments. This wizard has two printing steps. Step one will print variations of black removal, and step two will print variations of the amount of white ink used for areas which are semi-transparent.
To access the Black removal wizard:
- First ensure there are no jobs in the queue.
- Go to the Queue menu and select “Setup Black Removal”. This will open the wizard where you will set the page size of your print bed.
- Select the graphic that you want to use as the print sample.
- Set the size you would like to print the graphic.
- Select “Next”. A new dialog, the “KnockMeBlackOut” settings, allows you to select the minimum and maximum values of “KnockMeBlackOut”, as well as the increment of change. The default value for the KnockMeOutBlack setting is currently 60.
- Click Print KnockMeOutBlack chart. You can leave the KnockMeOutBlack dialog open and click on the Digital factory window seen behind the dialog.
You will see that 6 jobs in the Queue to the left with black removal values from 45 to 70.
To get a quick visual example of the amount of black removed in each increment:
- Go to the queue and select any of the jobs.
- Right click and select “RIP only”.
- Right click on the job again and select “View Raw Data”.
- Print the samples to help you choose your KnockMeOutBlack value.
- Compare the amount of black removed from each of the increments.
- Go back to the KnockMeOutBlack wizard and in the field representing the preferred amount of black removal on the right, enter the desired value.
- Click next.
This takes you to the white levels portion of the process. Here you can tune the white levels and the amount of underbase white in that will be used. This will print separation curves controlling how strong the white is printed in highlights, midtones and shadows.
You can choose from 4 different charts:
- Strong White midtones-shadows.
- Medium plus White midtones-shadows.
- Medium White midtones-shadows.
- Light White midtones-shadows.
Click the “Print white level chart” for your initial choice. The chart that is created has 4 options, A3, B3, C3 and D3. These separation curves are used when printing the samples. Notice they different starting points for printing white.
Similar to the black removal, to get a quick visual example of the white ink level of each increment:
- Go to the queue and select any of the jobs
- Right click and select RIP only. Once this is processed,
- Right click on the job again and select “View Raw Data”.
This again creates a preview that is representative of the output but not a perfect replication. You can now see the difference in the amount of white ink levels. It’s best to print the samples to help you further in choosing your white level value. We encourage you to experiment with other curves to see how you can optimize your output to your preference.
Select you chart, which brings you to the final dialog. Here there are three options:
- Only apply the black removal amount to the queue
- to the current printmode
- create and new printmode.
We recommend creating a new print mode, giving it a name and click “Finish”.
A new printmode with the chosen black removal setting has been created and you can select it on the printmode dropdown list found on the Queue tab in the lower right area of your screen.
For a walkthrough on this feature, check out our YouTube video below!