SignLab is a powerful production software platform, with driver support for hundreds of different machines. If you work with Mimaki RasterLink™ or Roland VersaWorks™, SignLab packages are built to specifically operate these devices at their best. To quickly prepare and output jobs to RasterLink™, use SignLab RasterLink™ Edition, and for VersaWorks use SignLab VersaWorks™ Edition.
Sending a job to RasterLink

Note: To ensure registration marks are produced per job rather than individual copies, it is recommended to use Layout > Array rather than adding copies in the RasterLink dialog.
- In SignLab, apply cut paths to the design and go to File > Print to RasterLink.
- On the Preferences tab, specify to output selected objects only and whether objects must be within the sign blank bounds.
- If cut paths have been created on the workspace, the Cutting Options tab is available to set registration marks.
Note: Registration marks must correspond to settings in the Cut SmartBar, otherwise they will not be recognized. - In the Cut conditions section, select out of the five presets defined in the Cut SmartBar, and select Half Cut preset.
- Click OK to continue.
- To send a job, right-click to access the context menu, and choose from the Cut dialog.
Sending a job to VersaWorks
Note: For network printing, when you launch SignLab for the first time, a Browse for Folder dialog appears to help identify the installation folder for VersaWorks. Once completed, SignLab is configured to use the color profiles within VersaWorks.
- Import or create your design in SignLab.
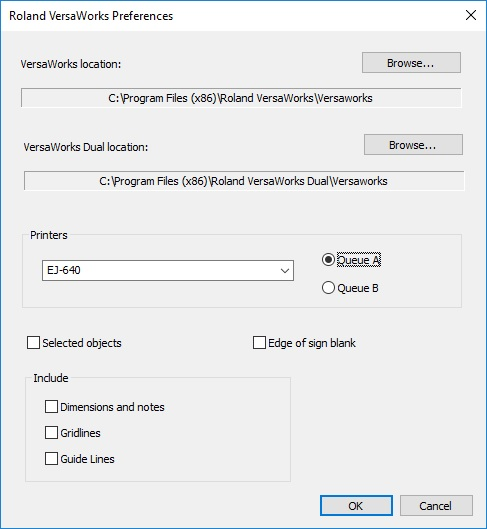
- Go to File > Print to Roland VersaWorks.
- When prompted, choose Queue A or Queue B.
SignLab 10 supports VersaWorks and VersaWorks Dual, which are 32-bit applications. To send an EPS file directly to VersaWorks, go to File > Print to VersaWorks, then select the printer and queue.
For example, with Queue A selected, export folders are:
For old VersaWorks:
C:\Program Files (x86)\Roland VersaWorks\VersaWorks\Printers\%printername%\Input-A
For VersaWorks Dual:
C:\Program Files (x86)\Roland VersaWorks Dual\VersaWorks\Printers\%printername%\Input-A
Troubleshooting Tips
- User rights issue: Is the file exporting to VersaWorks? Test this by exporting the file from SignLab to one of the directories listed above. If an error occurs, assign Full Rights to Everyone for the VersaWorks folder.
- Printer not listed: Reinstall the printer in VersaWorks or reinitialize VersaWorks (Start menu > Roland folder).
- Update VersaWorks: Go to Edit > Preferences > Roland@NET.
Recognizing cut paths in VersaWorks
When a print or cut job is sent from SignLab to VersaWorks, a special cut path name is used to tag cut paths within the job file (“CutContour” by default). If this name is updated in VersaWorks, SignLab will need to be updated to ensure the correct cut path is used during output.
- Go to Options > SignLab Setup > PostScript Setup.
- Edit the name as desired.
Connecting VersaWorks to Remote PC
If you want to use VersaWorks remotely, you will need to change the queue input folder, then ensure you have Network Sharing configured.
A remote computer is not able to access the original input folder in C:\ProgramData.
To change the queue input folder:
- Go to Edit > Queue Settings > Queue “x”.
The Queue “x” Properties dialog appears. - Select the Job Management tab.
- In the Input Folder field, browse to a new folder location.
For example: C:\Users\FirstName\Desktop\Hot Folder
Once this is completed, you can set up sharing.