 Everyone’s workflow is unique. How you choose to work through the powerful features found in SignLab, EngraveLab, and ProfileLab are up to you.
While a key feature of CADlink software is a common user interface across multiple software packages, that interface is customizable to fit your production needs. Let’s take a look at how to customize the toolbar size and color in SignLab, EngraveLab, and ProfileLab.
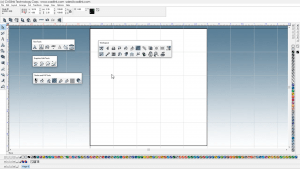
To start with, the main toolbar on the left hand side has fly outs, or nested options that can be positioned where you need them on your workspace.
Preset toolbars, found along the top, have selections of grouped tools and features. These can also be dragged out and placed where you need them.
To begin editing your toolbars:
- Click “View” menu.
- Select “Toolbars”.
- Open “Customize”.
From here, you can:
- Toggle different toolbars by selecting the check boxes on the left.
- Choose between preset toolbar sizing options.
- Switch between classic and alternative icon styles.
- Opt for color icons or use grayscale icons.
By highlighting a toolbar in this menu and selecting “customize”, you can further set the toolbar to your preference. This option allows you to add or remove tools you use the most.
In this same space, you can click “New..” to create a new toolbar with only the features you need. These custom toolbars can be given a custom name and can also be docked to the top or positioned where you need them in your workspace.
When you’re happy with your toolbar arrangement, go to:
- “View” menu.
- Highlight “Toolbars”.
- Select “Save Toolbar Profile…”.
- Give this profile a name and click “Save”.
This saves your toolbar profile so it can easily be accessed should your workspace change. To load your profile, use the same menu as saving, and select “Saved Toolbar Profiles” to find your custom profile.
You can also export your toolbar profiles. To do so:
- Select the “View” menu.
- Highlight “Toolbars”.
- Choose “Export…”.
- Give this profile a name and click “Save”.
This backs up the toolbar setting as an .INI file. Should you need to restore a toolbar profile from an .INI file, you can use the same menu and select “Import…”
With these tips, you should be able to have the perfect workspace for your production, with all your settings backed up as well!
To see a real time video covering these menu options, CLICK HERE.