 Properly printing white ink can make or break your prints, especially in DTG, DTF, and UV printing. When you use different materials or substrates, you need a different amount of white ink. The right amount of white ink ensures opacity and gives bright brilliant colors.
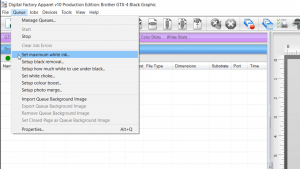
To access the Set maximum white ink wizard:
1) Go to the “Queue” menu and select “Set maximum white ink”. This will open the Set maximum white ink dialog.
2) Set the page size of your print bed. Next, select the graphic to use as the print sample.
3) Set the size to print the graphic and select next. A new dialog will allow you to select the minimum and maximum values of white ink as well as the increment of change.
4) Set your minimum and maximum values as well as your increments.
5) Now click Print Max White ink chart.
Select any of the jobs, right click and select print or select the print icon from above. After viewing the printed results and comparing the color and vibrancy of the different jobs, go back to the Set Maximum wizard and in the field representing the preferred white ink percentage on the right, enter the chosen value, and click “next”.
In the final dialog there are three options: only apply the white ink percentage to the queue, to the current printmode or create and new printmode. We recommend creating and naming a new print mode before clicking finish.
A new printmode with the chosen max white ink setting has been created and you can select it on the printmode dropdown list found on the Queue tab in the lower right area of your screen.