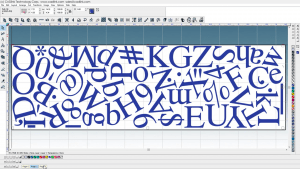
Looking to maximize your print material by making sure you use every inch? Rather than spend hours moving all your objects together, let the computer do the calculations and figure out the exact best spot to place your objects with the Nesting feature.
Nesting objects reduces wasted material by flipping, grouping, and rotating objects on the blank to achieve maximum use.

Note: If you are nesting individual letters in a sentence, apply Arrange > Text to Graphics prior to continuing. Otherwise, the sentence is nested as a whole.
- Select objects in the workspace.
- Go to Arrange > Nesting.
- Select options in the SmartBar and click Apply or Close.
You will see that your objects have appeared to have been scrambled. This is the objects being repositioned to most efficiently use the space, allowing you to place more and get more out of your print. This is especially useful when printing objects to be cut from vinyl or cutting out objects with engraving.
As mentioned, you have options in the SmartBar to adjust how your objects are nested. You can choose:
- The corner in which objects will be nested
- The amount of rotation to be applied to objects during nesting
- Margins and offsets objects will have relative to each other when nested
- If space allows, toggling whether objects can be nested within other objects
Once your nesting is configured, you’ll be ready to output, saving valuable material in the process!