Contour cuts are useful for stickers, labels, wall art, signs, logos, etc.
You can apply contour cuts in SignLab, EngraveLab, ProfileLab, and Digital Factory. The methods are slightly different depending on the program you’re using – they are outlined in this blog.
Contour cuts create a cut path around image frames or around and on the inside contours of objects. They can also be merged to create a single cut path around multiple objects.
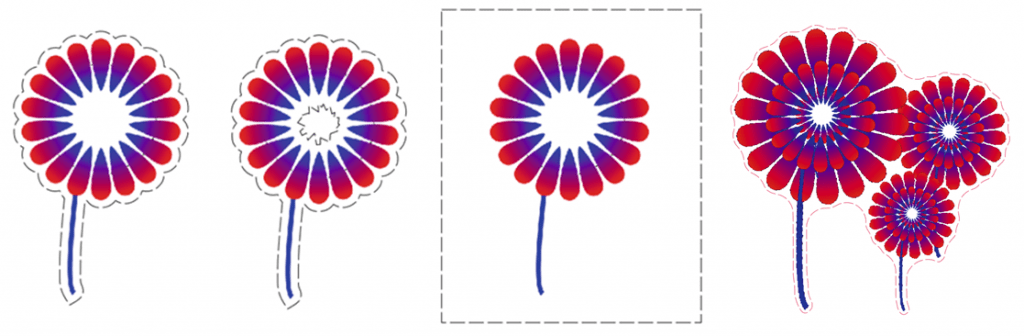
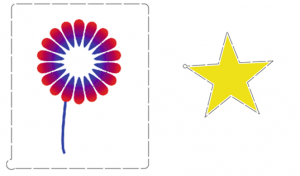
Half cuts create a contour cut around images or objects with optional peel tabs.
In SignLab, EngraveLab, and ProfileLab:
Contour Cut
1) Select an image or object.
2) Go to Cut > Contour Cut. (A contour of the object will automatically be applied).
3) If it’s an object, and you also want the inside contoured, select Inside/Outside.
4) If it’s an image, and you want only the frame contoured, select Bitmap Frame.
5) [Optional] Choose cut offset and color.
6) [Optional] Select corner style, set bleed, group objects, or invert bitmaps.
7) [Optional] With more than one object, to create a single contour, select Merge. To control the contour tightness, use the slider.
8) To close the SmartBar, double-click anywhere on the workspace.
9) Select all and go to File > Print and Cut.
Half Cut
1) Select an image or object.
2) Go to Cut > Half Cut.
3) Select a corner style and cut offset and color.
4) [Optional] Select group objects.
5) [Optional] Select peel tab and choose a position for the tab to be added.
6) To close the SmartBar, double-click anywhere on the workspace.
7) Select all,
8) Go to File > Print and Cut.
In Digital Factory or VPM (Method 1, depending on your program options):
From SignLab, EngraveLab, or ProfileLab, where you apply cut options
Select the queue set up to receive the contour cut job.
Click the Cut Stroke Setup icon next to the job name.
Ensure the cut stroke color matches and the cut process is enabled.
Select a cut process. For more options, click the ellipsis.
To change the cut line, apply a cut line transformation.
Click Print and Cut Job or Cut Job in the toolbar.
Applying a Contour Cut in Digital Factory or VPM
1) Select the job.
2) In the Jobs menu (or right click), select Contour Cut > Add.
3) Select a cut path from the drop-down list. These labels come from the device driver and can be edited on the Color Actions tab in the Cut Stroke Setup section in Queue Properties.
4) Select options in the dialog with help from the table below.
5) Click Print and Cut Job or Cut Job in the toolbar.
| Contour Cut | |
| Apply to all incoming jobs | Select to enable tab selections to apply to all incoming jobs. |
| Drop-down | Select a cut path and color from the drop-down list (a named color to be used as a cut path). These labels come from the device driver and can be edited on the Color Actions tab in the Cut Stroke Setup section (see above). |
| Also cut inner corners | |
| Offset amount | |
| Corner style | |
| Soft edge contour cut | Use the arrows or slider to reduce or increase offset of soft edge contour cut. |
| Contour accuracy | Use the drop-down to select smooth detail or fine detail. |
Method 2 (depending on your program options)
In Digital Factory
1) Select the job.
2) Click Contour Cut.
3) If it’s an object, and you also want the inside contoured, select Inside/Outside.
4) If it’s an image, and you want only the frame contoured, select Bitmap Frame.
5) Choose cut offset and color.
6) [Optional] Select corner style, set bleed, group objects, or invert bitmaps.
7) [Optional] With more than one object, to create a single contour, select Merge. To control the contour tightness, use the slider.
8) When finished, click Apply.
9) Click Send to Queue.