 KnockMeWhiteOut automatically removes the white from a design, so that the white of the shirt is used instead. Without the white printed in these areas, less ink is used and will result in a softer and lighter feel. This is a very useful function for DTF and White Toner Printers.
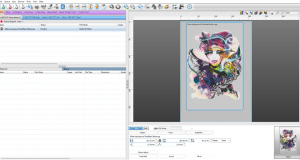
Starting with the job imported to the printer queue, go to the queue tab in the lower right and select a printmode for white shirts from the drop down list to the right. Create a Printmode with KnockMeWhite out using the Printmode you selected as a starting point. By creating a custom printmode, you can then use it for any jobs you have in the future.
Go to the queue menu and select properties found at the bottom of the menu. In the Queue properties dialog:
- Click on the arrow next to the color layer title on the left and more options are revealed.
- Click on “Processing Options”.
- Select “Use Knock Me White Out”.
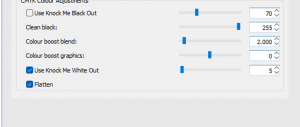 The slider sets the tolerance for what is defined as white. A value of 0 is pure white, with the RGB values of 255, 255, 255. A value of 5 has an RGB value of 250, 250, 250. This will allow a color that is slightly off white to be seen as pure white and be knocked out. The White removal process can result in a hard edge effect. There is either white ink in the area, or the white knocked out and the white of the shirt will be used to represent the white in the design.
Set the value to your desired amount and click on “Create Printmode”. Give it a name describing the features of this printmode, such as 1440×720 White Removal. Click on save and then Ok.
This printmode will now be available in the printmode dropdown list found in the queue tab in the lower right. You will have a dialog pop up warning you that changing the printmode will reset all properties back to the defaults specified by the printmode. Click yes to continue.
Before printing, we can get an idea what the design will look like when printed by viewing the raw data. To do this:
- Right click on the job in the queue.
- Select “RIP only”.
- Once the job is finished ripping, the status of the job will now say Job spooled.
- Right click on the spooled job.
- Click on “View Raw Data”.
You may have a dialog pop up stating that view raw data will show a representation of the process output. The colors may not accurately reflect how they will look in the final print. Click ok
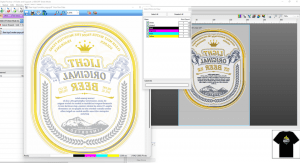 On the top right you will have 2 Icons. The left icon will activate a window with the colors and layers. You can select individual colors. White would show as white. To see what is printed with white ink, you can either change the background color by selecting the color bar at the bottom of the window and choosing a color, or click on the right Icon, View all colors as black. When you deselect CMYK Planes you will see where the white ink will be printed. The white of the label will not be printed and the white of the shirt will be used instead, leaving the shirt softer than it would have been if you didn’t use KnockMeWhiteOut.
The second example has an image with gradients of different colors into white. When using KnockMeWhiteOut, the white ink cannot be a gradient and will simply stop. The white of the shirt will never match the white of the ink and where the white ink stops printing and the white of the shirt is then used, you will see a noticeable change in the white giving and undesirable result.
To start printing with this printmode, go to the Films to view window, deselect the CMYK layers leaving the white layers active. Next, click the button for View all colors as black. This will show where the white ink will be printed, and you can see where the ink will be knocked out. The KnockMeWhiteOut process has a hard edge result, and is not the best process for gradients. It will leave a hard edge under the gradient colors.
Go back and click on “View All Colors As Black”, to toggle this mode off. Go to the layers window and tick all layers on. Change the substrate to a light grey and you will see a posterized look where the white ink stops and the white of the shirt will appear. The extent of this effect will depend on the image used, the white ink and the value of white of the shirt. It’s difficult to determine how much it will distract from the final print until you print it onto a shirt.
 Depending on the results with your design, you may want to use our Fluid Mask Plugin. This plugin will selectively remove white areas allowing you to use a printmode that does not use KnockMeWhiteOut. The Fluid Mask plugin is an add-on module available for select Digital Factory packages. If you do have Fluid Mask in your package, right click on the job in the queue and then click on “Edit with Fluid Mask”.
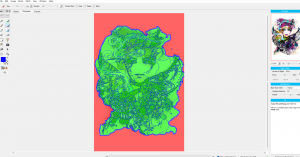
With Fluid Mask you can define which areas you want to delete, in red, and which areas you want to keep, in green. After using Fluid Mask the outside white was removed but the white inside the design will remain.