You might have put in the work to take down all the 1960’s wallpaper in your house, but the aesthetic of the repeated design is back. Creating it manually can be a time consuming process, but with the step & repeat feature, getting a customized, repeatable pattern from your images is a breeze.
Start by importing your image. Sometimes, images include unneeded space around them. In order to create more aesthetically pleasing patterns, it is better to crop the image a little tighter before you start creating your pattern. To do so, open the job tab and click on “tiles”. There you can adjust the crop of your image by dragging the corners.
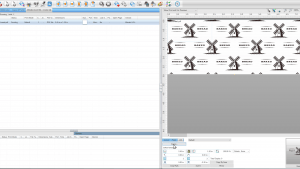
The “copies” tool provides users with two standard options: create single or multiple copies of an image, or to access the Step and Repeat tool. To get standard copies of the image, click on “copies” under the job tab. By default, Digital Factory will create one copy of your image. To get a more customized, repeatable look to your copy, click on copies again and the step and repeat feature will open.
There’s two main parts to the interface; the preview area and the properties. The preview area is a live preview and will reflect any of the changes you make in the properties. In the properties you’re able to adjust the number of rows and columns to create a seamless pattern with your image.
If you want to change the look, there are 5 different patterns to get you started, with options to tweak them even further. The “generate partial items” option is turned on by default, but if you don’t like the look of that you can easily turn it off by unchecking that box. You can adjust the spacing of each image by percentage or specific measurements, and you can also save these as presets for future use using the “save” and “load” buttons at the bottom.
To see just how easy it is, get started with the video below.