 Ink limiting is useful for saving you money on ink, which in turn can also help reduce print errors and give you better print quality. There are a number of issues and tips to consider, so let’s walk through some settings and troubleshooting.
To start:
1) Go to the Devices menu and select Manage Print Modes.
2) In the Print Mode Manager select your device from the spectrophotometer drop down list.
3) Select a base print mode from the available print modes below and click on the Full Print Mode Creation icon in the icons at the top of the dialog.
Please note that your package must have the profiling module to use this!
4) Name your new print mode and click ok. Now in the Full Print Mode Creation Wizard you will set your resolution and print options.
5) Next you will create a reference used during the process of adjusting the ink limits, make sure Lower ink amount is selected near the bottom of the dialog and click on Print Ink Chart.
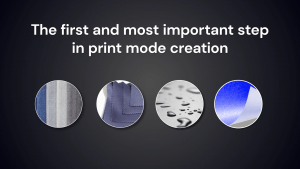
The aim is to get the deepest colours without sacrificing quality and over-inking. Bleeding, coalescence, banding, and graininess are things you want to avoid. Using a flashlight or your phone light will help you to get a better look of your colour output and is highly recommended when ink limiting. Red is normally the easiest color to judge. Here’s what can cause each issue you may encounter:
Bleeding: Can be caused by process black spreading into your secondary (RGB) colours. This can be corrected by adjusting the levels of ink used in the printing process in the printmode creation.
Coalescence: Also known as flooding occurs when the ink coverage is greater than can be absorbed, and can look different depending on media. On a matte media, coalescence will cause the print to look uneven and patchy. On a coated/glossy media, it can look grainy and pool in certain areas, due to reaching the saturation point of the media. This can be corrected by adjusting the levels of ink used in the printing process in the printmode creation.
Banding: Caused by either missing nozzles or too high an ink volume. Always perform a nozzle check (and clean if necessary) before making a print mode. Missing nozzles can cause banding due to a lack of ink. This is a hardware issue that needs to be addressed. Banding can also be caused by too high an ink volume that occurs in high resolution prints where the print speed is slower allowing the ink to build up. This can be fixed by changing the ink levels in Print Mode Creation.
 Other Considerations
There are several additional items to consider when creating profiles or ink limiting. The technology used tends to exhibit different issues when you over-ink. Solvent inks will have more bleed and coalescence. UV printing may show more banding and DTG and DTF can have issues with color mixing with the white.
Print speed also contributes to quality. All inkjet printers can print better quality when printing slower. Uni-directional mode will always print less grainy than Bi-directional. Higher resolution prints more passes and reduces banding. You may have a printer option to increase the number of head passes
When printing with a white ink and CMYK you can have issues of ink migration. This occurs when the White ink mixes with the CMYK. This causes the CMYK to appear washed out. The White ink is used to block out the background and create your base white substrate for the CMYK.
On a black shirt, you want to block out the black with the white as much as you can without too much ink migration. More white will block out more of the black shirt but will have more ink migration and will require less CMYK. Less white will in turn allow for more CMYK but reduce your white point and make your prints too dark. Balance is key.
Compromise is required with most inkjet printers. The trick is to find the point where you get good, strong secondary RGB colours with as little bleed, coalescence or hardware issues possible.
For a more detailed look at ink limiting, check out our video below: