 With your variable data, applying cutlines can sometimes break the overall fit of your design. This can happen with text or detailed images, resulting in marooned sections that if cut as is, would result in separate pieces. The Merge feature of the contour cutting function in the Variable Data Wizard allows you to bring these cutlines together, preserving your artwork or text!
For example, say you want to create Bike Stickers where the images and text will be replaced, and each sticker will have its own contour cut line. Working with this, we’ll show how the merge function can take four individual cutlines and force them into a single path, so your sticker can be a single cut out.
In this example project, we want to create bike stickers where we will replace the names of the cyclist and the country flag where the cyclist comes from.
To start:
- Import a flag into our Queue.
- Right click on the flag graphic loaded into the queue
- Select “Variable data wizard”.
- Resize the Image.
To make sure that all other images will be resized, you’ll select the image and tick “To Fit” in the smartbar above. Next, to the left, change the object width to your desired size and press enter. The object height will change proportionally.
To add text to the sticker:
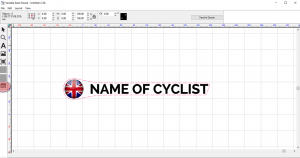
- Move the flag to the middle left of the screen.
- Selecting the text tool.
- Click and drag a box to the right of the flag.
This will represent the maximum area the text will take up. Therefore, if the replacement text is longer, it automatically scales to enable the text to remain within the bounding box.
Before typing, choose the font and set the font size. Now type your text in all caps. Having the text in all caps will help when vertically centring the objects. The acsenders and descenders of lowercase text can result in inaccurate centring.
To center the objects:
- Click the select tool.
- Select both items.
- Click the “Alt” and “Home” buttons at the same time.
With the objects still selected, click on the Contour cut tool. Here you can create a contour cut and choose your cutline settings. Once you click apply, The monochrome filter will open and allow you to set your values for transparency. When you are ready to proceed, click ok.
Following along, you can see that the resulting contour cut is not connected and has four parts. These parts can be joined by using the Merge feature:
- Select the checkbox for Merge.
- Set the tightness to extreme by dragging the slide to the left.
- Click apply.
If the contour cut remains in parts, try Merge again. This time use a lower value for the tightness setting. Drag the slider farther to the right. Click apply, keeping your Monochrome filter values set the same.
With the right settings, the separate contour cutlines will have merged, and have now become one smooth cutline.
To continue with the VDW, including creating replacement values from a file, check out our post HERE.